Do you have a hidden trove of artwork in your house, but no idea how or where to hang it on the walls? Here’s how to get that art out of storage and onto your walls! Get Your Supplies
- Art
- Hammer
- Picture nails, picture hangers, or wire
- Measuring tape
- Level
- Pencil with eraser
- Piece of paper
- Rubber nubs (optional)
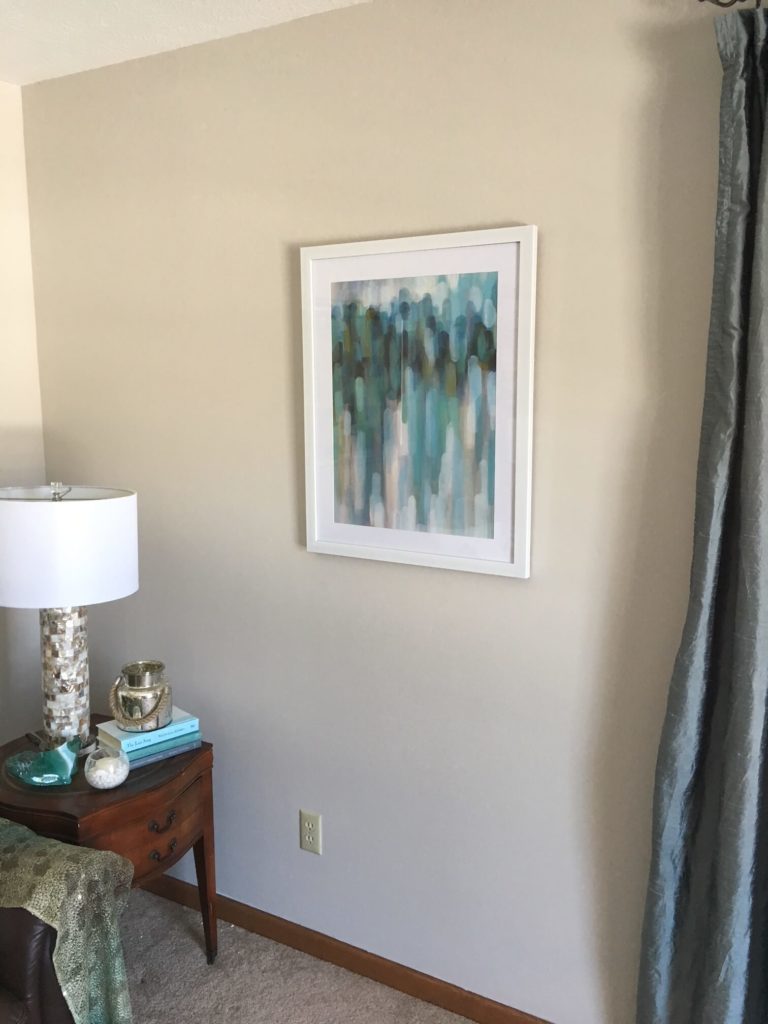
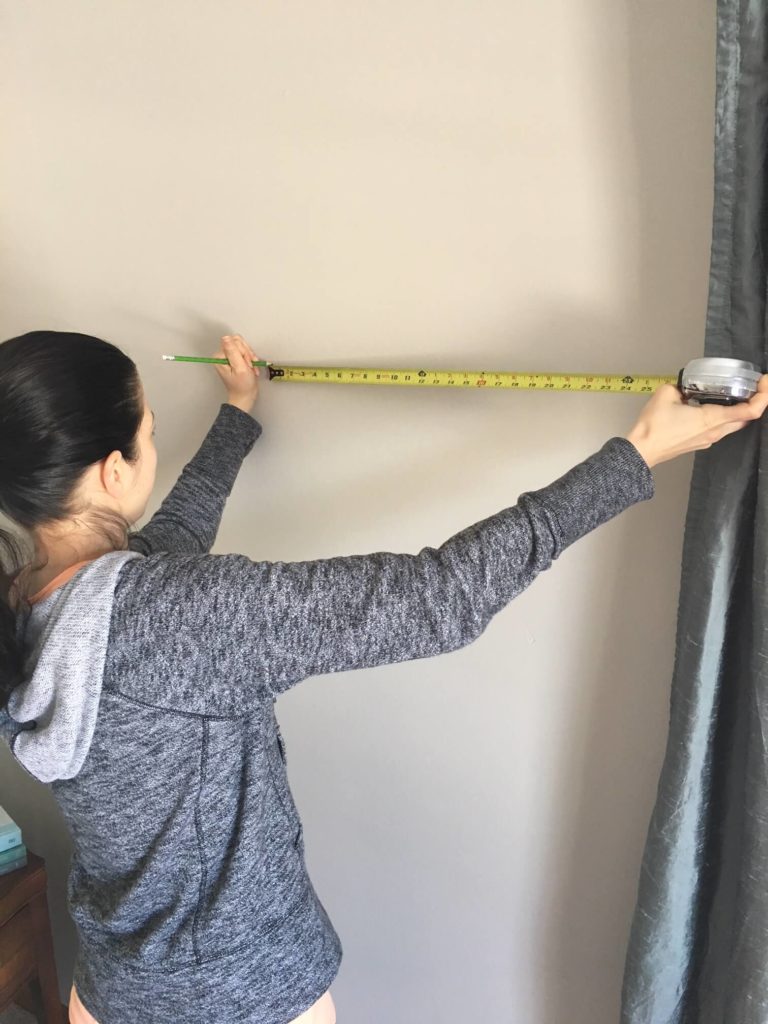
Hang The Art 1. Pick a space (a section of wall) for your art. Tip: A “space” does not necessarily include the entirety of a wall. In the picture below, you will see that the space that I am filling with art is the area between the lampshade and the curtain edge. Art does not need to be centered on the wall – it should be centered on the section of wall that you are filling. 2. Measure the width of that space, and divide that measurement in half. Write down that half-width measurement on that piece of paper you got before you started.
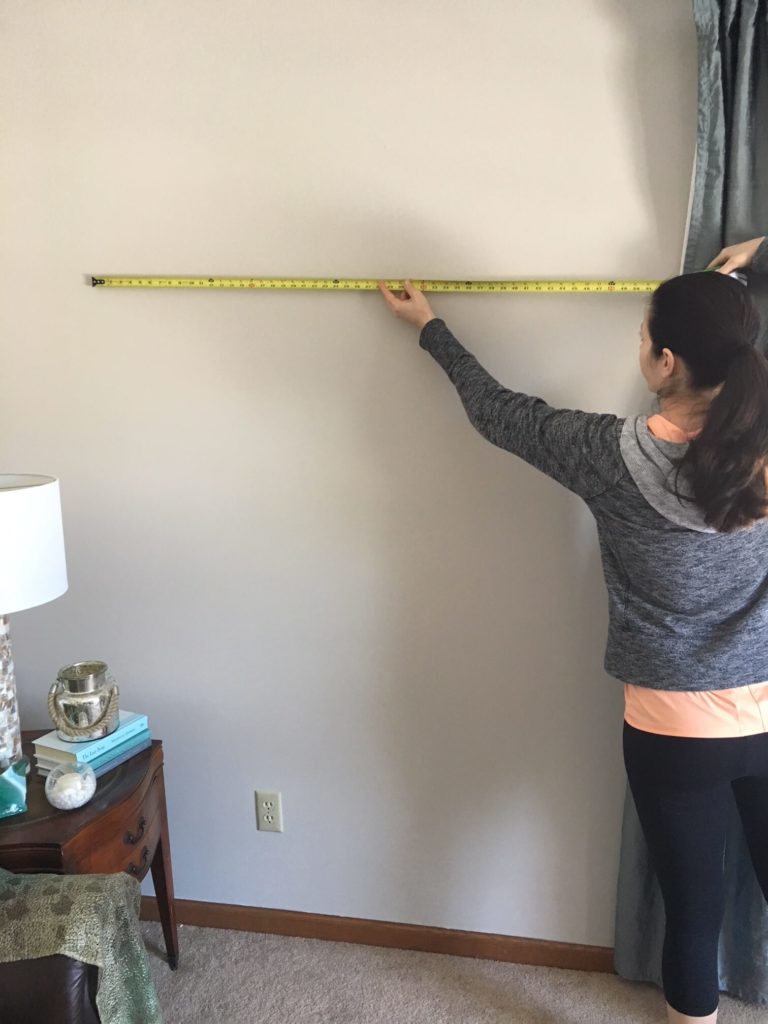
(Yes, I dressed up for you in my Sunday afternoon best. You’re welcome.) 3. Mark the “middle” of the space with a pencil by measuring the distance you wrote down from each side of the space. This will also help to double-check your math if the marks don’t end up together. No one will judge you for incorrectly calculating half of something like 37 3/8″.
4. Next you’re going to want to figure out how high your mounting hardware should be. Every frame is different. You first need to know how tall your artwork is. Measure the total height of your art. Write it down – more math is coming and unless you are annoyingly math gifted like my husband, you’ll probably forget whatever measurement you took.
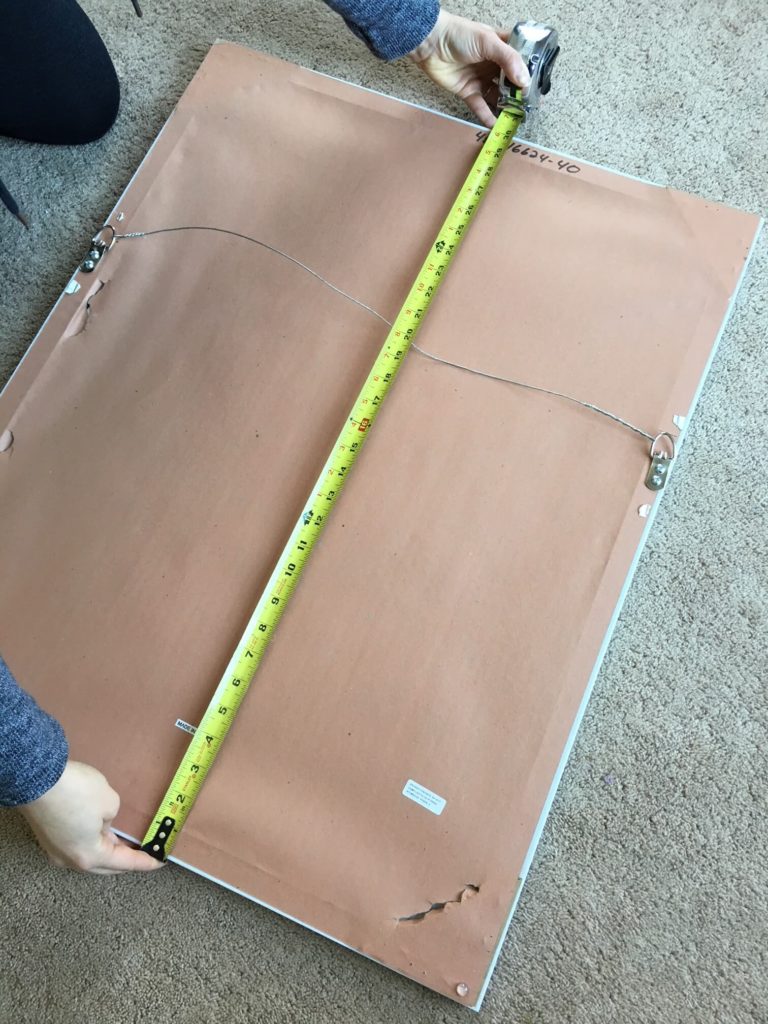
5. Divide the height in half (if the picture is 24″ tall, you’ll want to write down 12″). This is how high the top of the picture will be above center. Write this down. 6. Next, you want to measure from the top of the picture frame down to whatever mounting hardware it will be hanging from. If there is a hook, or two keyholes, measure down to those. If there is a wire, use the tape measure to pull up on the wire to simulate the art hanging from the wire. Write this measurement down.
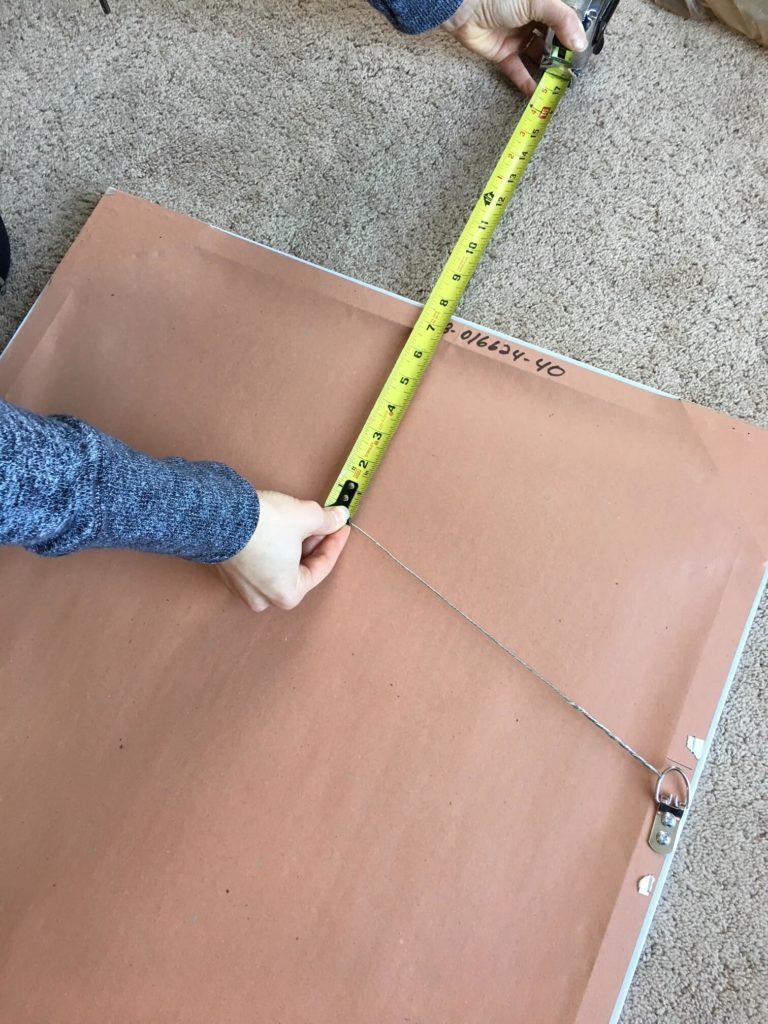
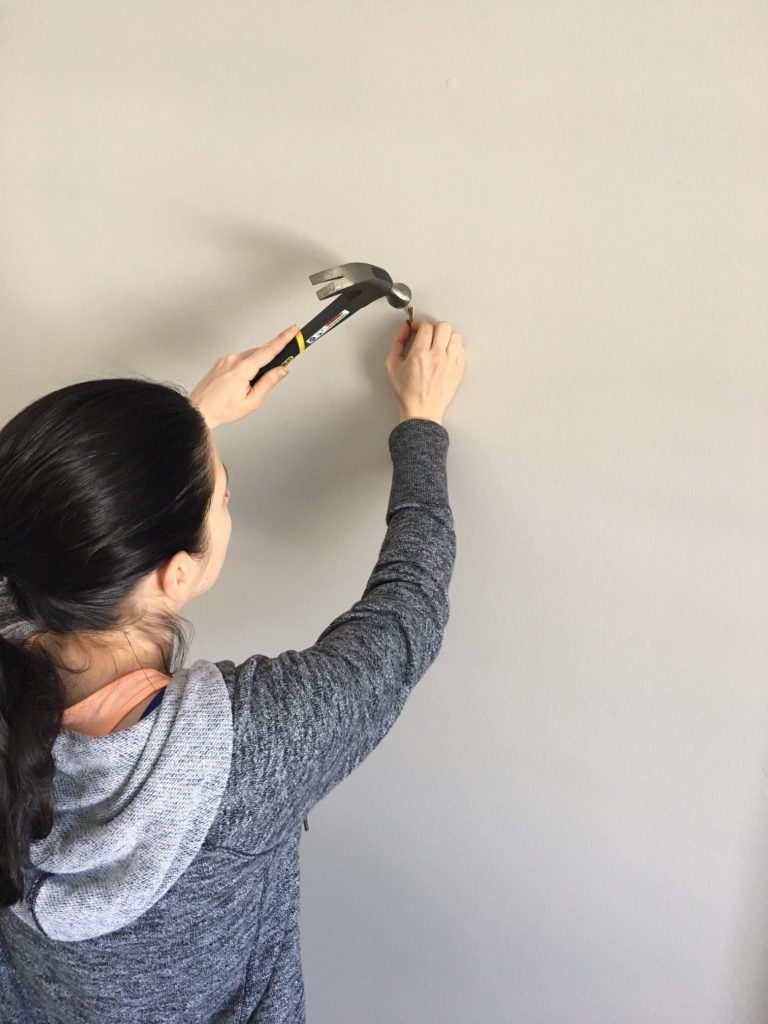
7. Subtract the distance from the top (the one you measured in step 6) from the half-height measurement in step 5 (i.e. if the 24″ picture mentioned above has a wire that would hang 5″ from the top, then we’d subtract 5″ from 12″ to get 7″). Write this down. 8. The standard height for hanging artwork is 60″ to the center. All of our math up to this point has been to determine how high to put the hole in your wall to achieve that desired center-height. Add your final number in step 7 to 60″ and this will be the height from the floor that you should measure (67″ in our example). 9. In summary, the formula for hanging art is: Nail height = (Art height / 2) – (distance from top to mounting hardware) + 60 10. Measure from the floor, in line with your center-line mark (from step 3), up to your desired height and make a mark on the wall. Erase any other marks on the wall.
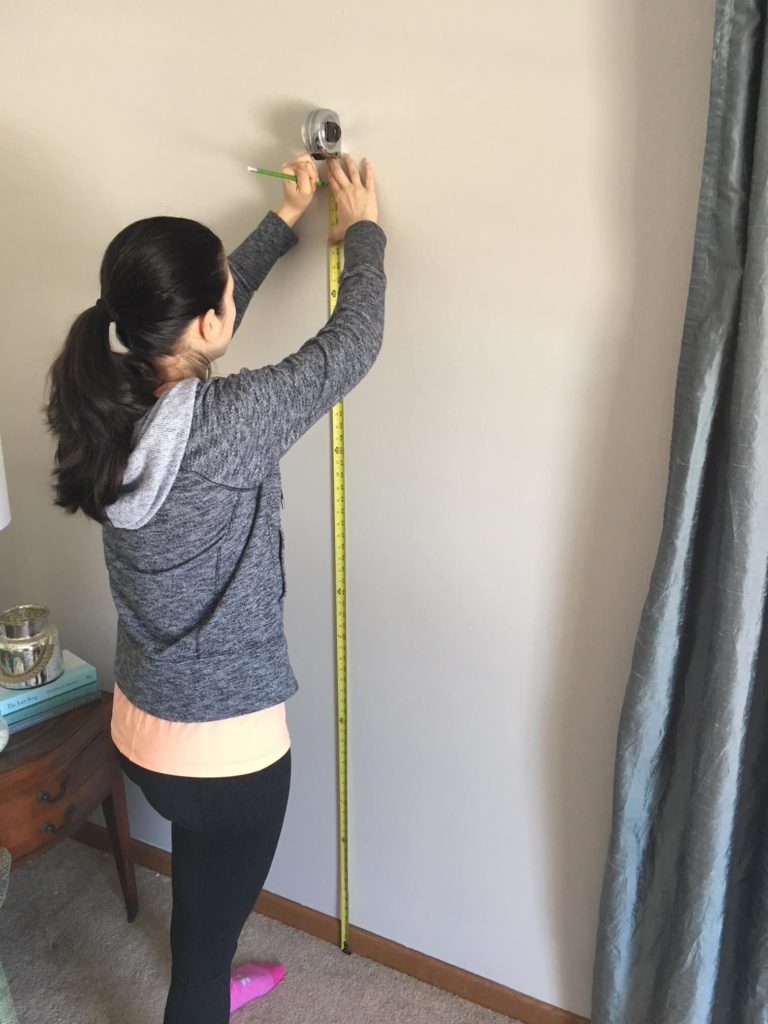
(Why yes, I am left-handed. Thanks for noticing.) 11a. If you’re using a regular nail, then you can go ahead and nail that sucker right into your final mark and hang your picture. 11b. If you’re using a picture hanger, be sure to line up the BOTTOM of the hanger (where the wire is actually held) with the dot, then nail the escutcheon pin into the wall above the dot as appropriate for the size of the hanger.
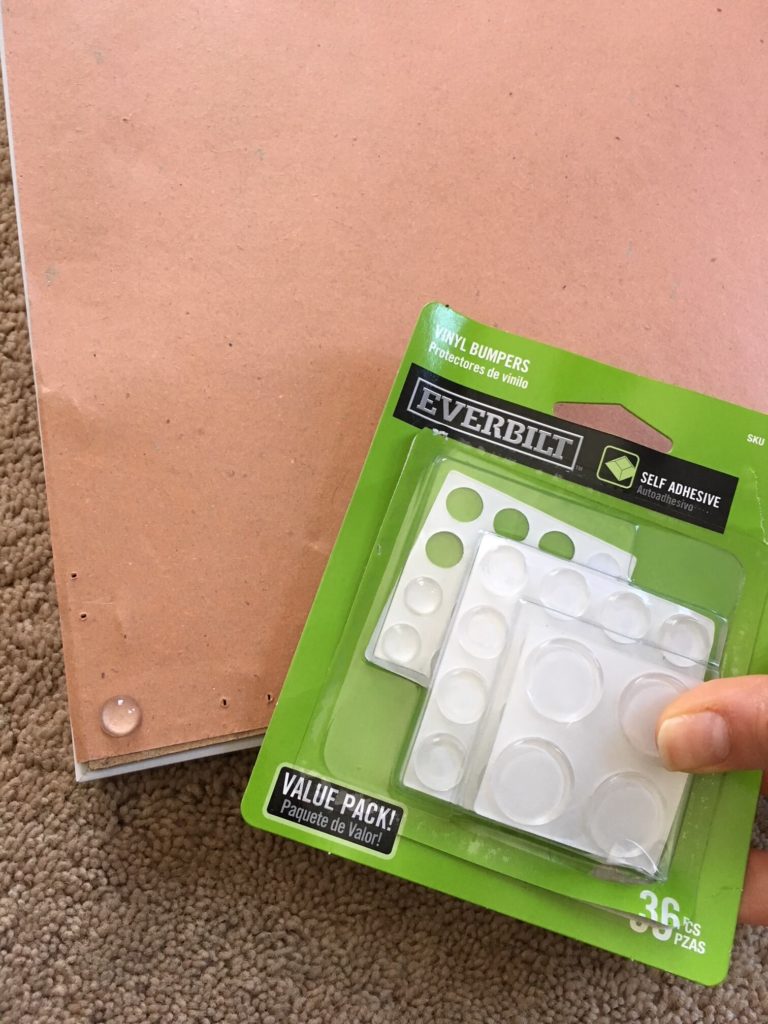
Note: “Escutcheon pin” is a really fancy word for “tiny little nail thing that comes with a picture hanger” 12. Put your rubber nubs on the bottom two corners of the artwork. This will help the art stay straight on the wall. (These are optional, but you can find them at any hardware store.)
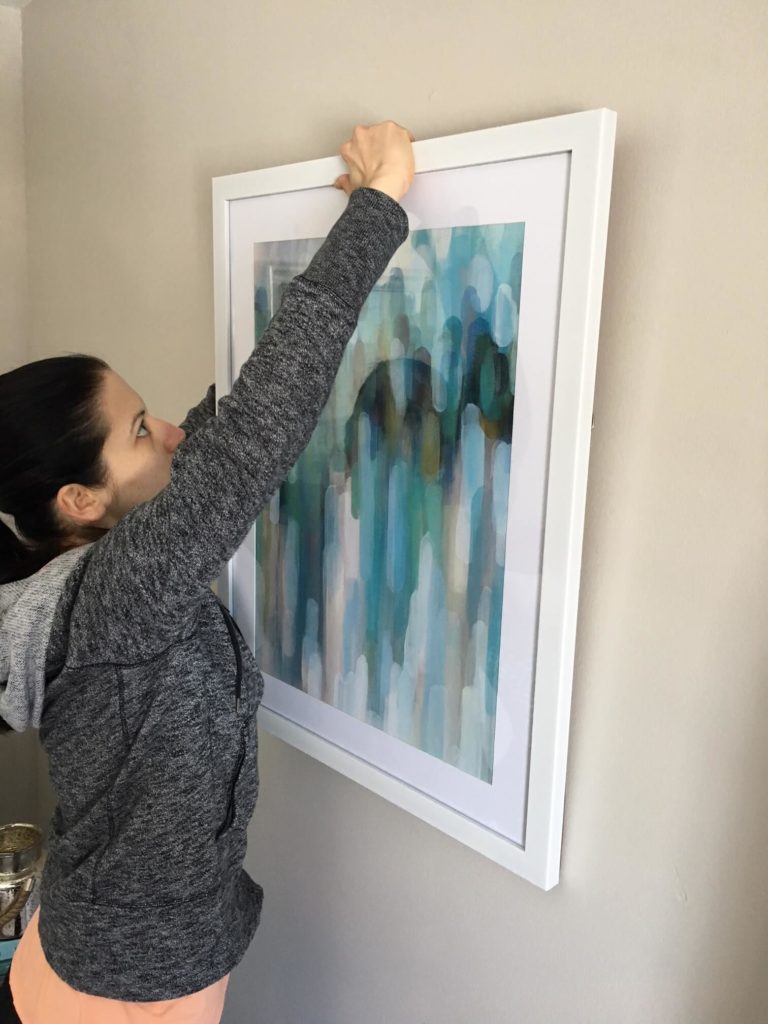
13. Hang up your art.
(I am indeed giving this painting my “mom glare.” It must have left crumbs on the couch or something.) 14. Put your level on the top of the painting and adjust it as needed.
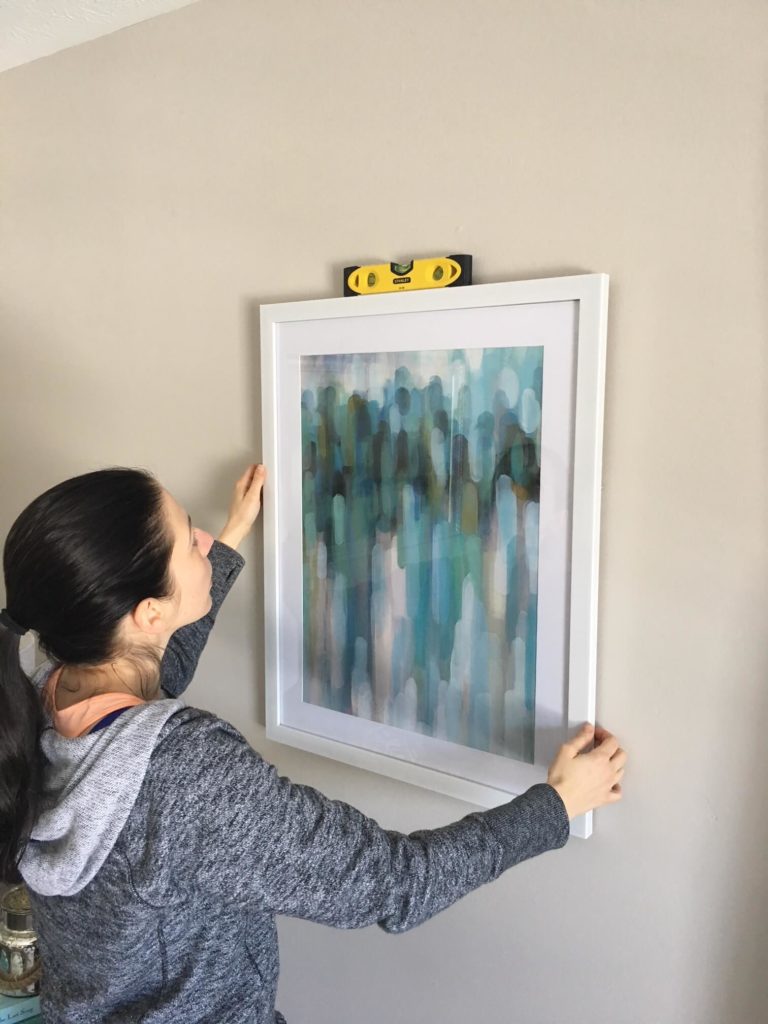
15. Step back and admire your properly hung, level masterpiece.